
Heute Morgen habe ich auf dl-nordwest.com gelesen, dass es ein neues Pi-Star von Andy Taylor (MW0MWZ) gibt. Ich war sehr gespannt, was Andy sich hat einfallen lassen, habe gleich eine SD-Karte geflasht und Pi-Star eingerichtet.
Schon beim Download fiel mir die Größe des Images auf: nur noch 164 MB. Das neue Image basiert auf dem sehr schlanken Alpine Linux. Ich nutze einen Raspberry Pi Zero 2 W, und die Performance ist beeindruckend.
Installation
Wie auf Andys Website beschrieben, wird das Image mit dem Raspberry Pi Imager oder balenaEtcher auf eine SD-Karte geschrieben. Anschließend kopiert oder benennt man auf der Boot-Partition die Datei pistar-config.txt.example in pistar-config.txt um und trägt dort die eigenen Daten ein. Bei mir sind das diese Zeilen:
# Pi-Star OS Boot Configuration
# Copy this file to the boot partition as 'pistar-config.txt'
# Remove the # from lines you want to use
# WARNING: This file will be DELETED after processing for security!
#
# This file works for FIRST BOOT and RECOVERY:
#   - First boot: configure WiFi, SSH, etc. on a new install
#   - Recovery: pop the SD card out, mount on a PC, drop this file
#     on the boot partition, put card back, reboot

# === WIFI CONFIGURATION ===
# Networks are numbered 1-10; when more than one is in range, the
# highest number wins. wifi_ssid (no number) is network 1, the lowest.
wifi_ssid=Name von eurem WLAN
wifi_password=Dein Passwort

# Preferred over network 1
#wifi_ssid_2=YourHomeNetwork
#wifi_password_2=YourHomePassword

#wifi_ssid_3=YourMobileHotspot
#wifi_password_3=YourHotspotPassword

# WiFi country code (affects available channels and power limits)
wifi_country=DE

# === USER SECURITY ===
# Set password for pi-star user (required for SSH password auth)
user_password=Passwort für den Nutzer pi-star

# Enable SSH password authentication (default: key-only)
enable_ssh_password=true

# Add SSH public key for secure access (recommended)
#ssh_key=ssh-rsa AAAAB3NzaC1yc2EAAAA... your-email@example.com

# === RESTORE A BACKUP ===
# Copy a Pi-Star backup (pistar-backup-....tar.gz or .tar.gz.enc,
# from the dashboard's Profiles page) onto this boot partition: it is
# restored as the hotspot starts. For an encrypted (.enc) backup,
# give its passphrase here (or the dashboard asks for it):
#backup_passphrase=YourBackupPassphrase
# A Pi-Star 4 backup (Pi-Star_Config_....zip) can be copied there
# too: its settings are brought across in the dashboard's setup.
# Whatever this file sets (Wi-Fi, password, hostname, timezone)
# wins over the backup's.

# === SYSTEM CONFIGURATION ===
hostname=pi-star
timezone=Europe/Berlin
locale=de_DE.UTF-8

# === SECURITY NOTES ===
# - Root account is disabled by default (secure)
# - pi-star user has passwordless sudo access
# - SSH password authentication is disabled unless explicitly enabled
# - THIS FILE WILL BE DELETED after processing for security
# - WiFi networks are preferred by number (wifi_ssid_10 highest, wifi_ssid lowest)
Erster Start
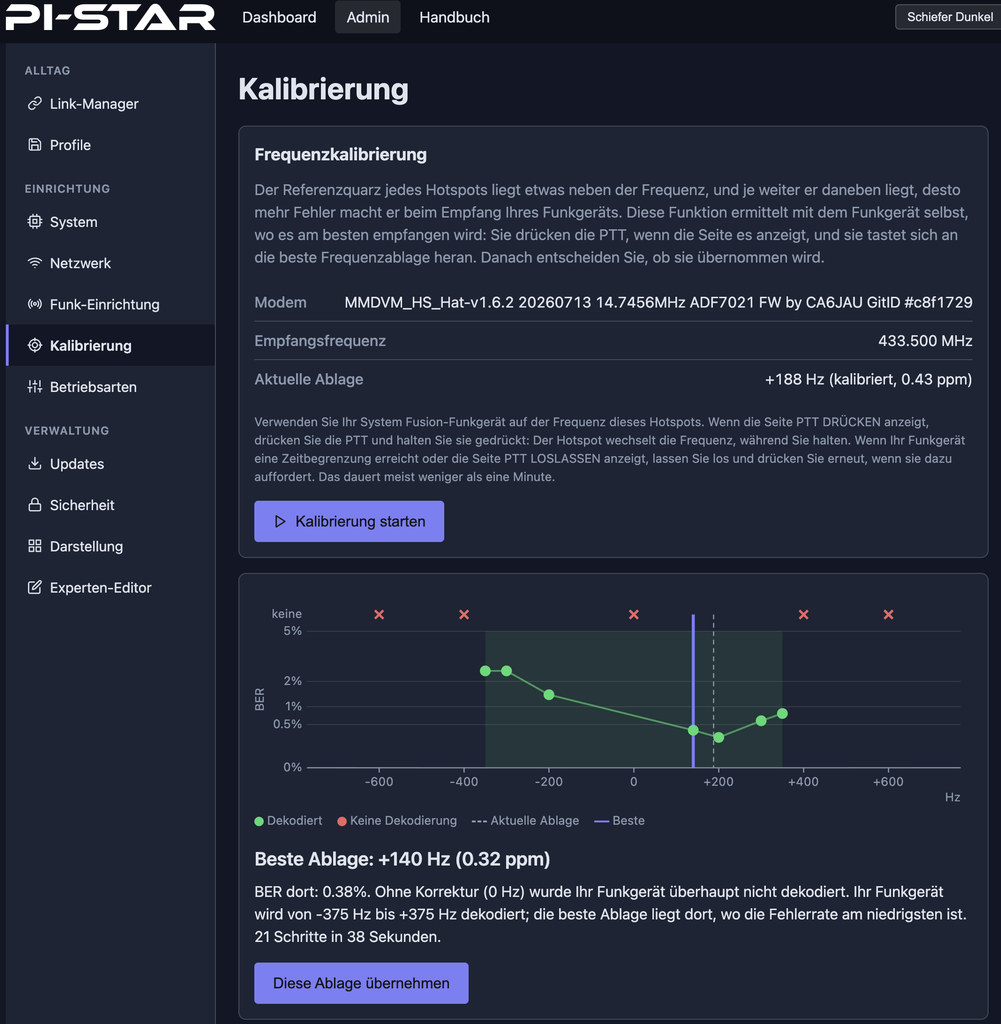
Beim ersten Start beginnt die Ersteinrichtung: Rufzeichen, Frequenz, Standort, Betriebsarten und die Kalibrierung des Hotspots. Gerade die Kalibrierung wurde deutlich verbessert. Meine MMDVM-Hardware inklusive OLED-Display wurde automatisch erkannt.
Neuerungen
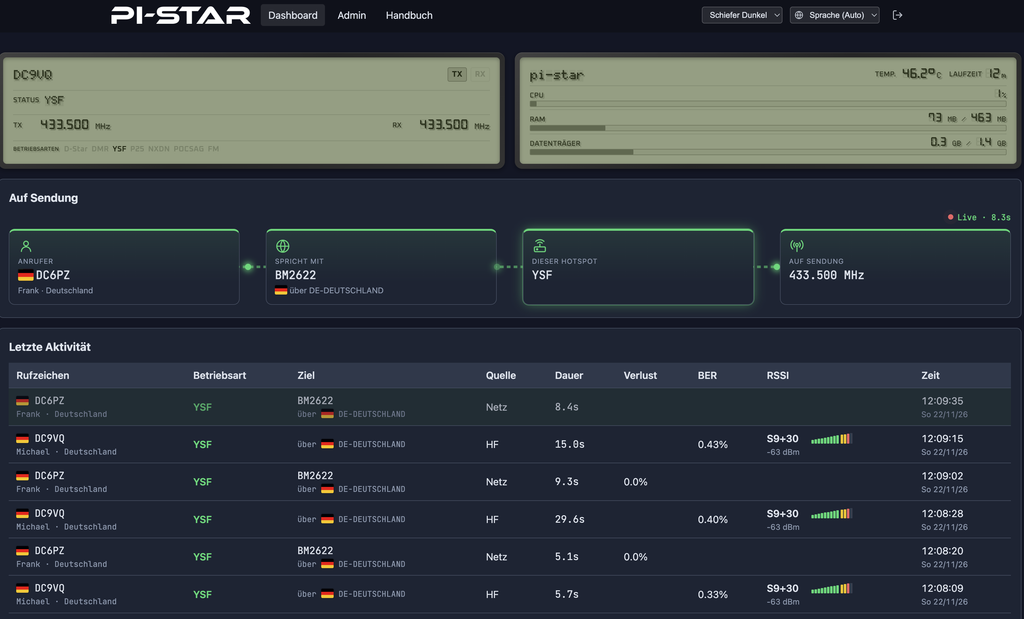
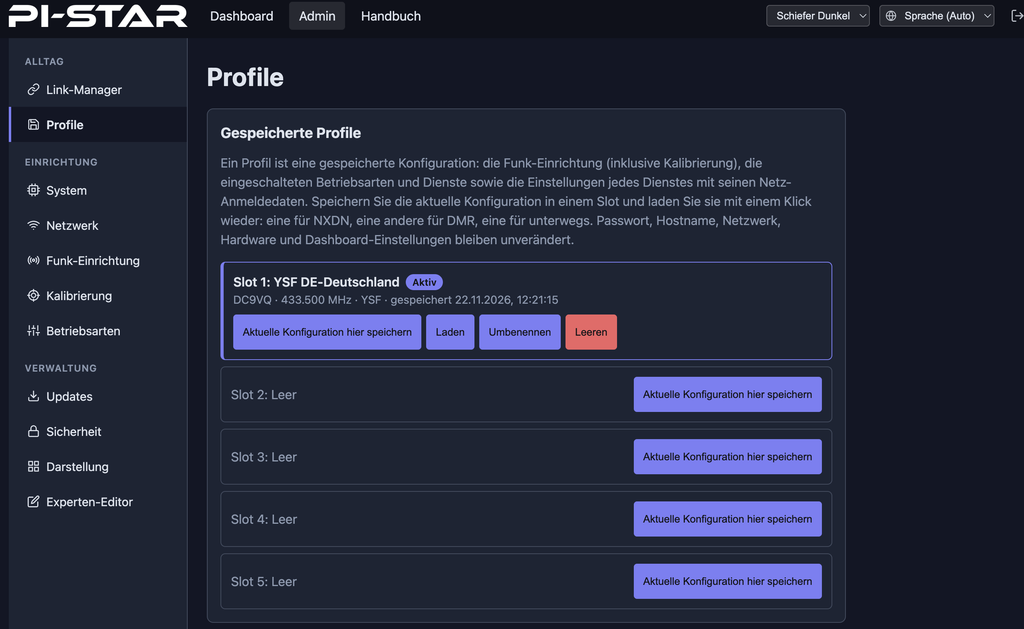
Das Dashboard ist modern gestaltet, daran musste ich mich persönlich erst etwas gewöhnen. Neu ist die Möglichkeit, Profile abzuspeichern, die ich bisher nur von WPSD kannte.
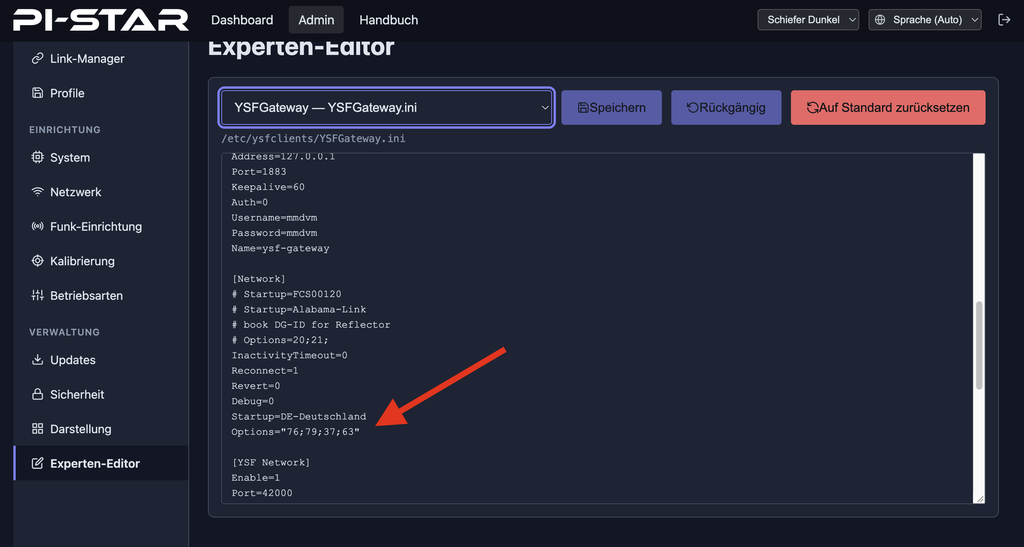
Der Experten-Modus umfasst jetzt auch die YSFGateway.ini. Dort kann man für YSF-Multistream-Reflektoren wie den YSF26200 – DE-Deutschland den Options-String eintragen, um einen Monitor mit unterschiedlichen DG-IDs zu befüllen. Die Unterstützung des YSF-DG-ID-Gateways scheint noch nicht ganz fertig zu sein, daher konnte ich sie noch nicht testen.
Profile
Experten-Modus – YSFGateway.ini
Fazit
Bei mir ist die Software bisher einmal abgestürzt. Da es sich noch um eine Beta handelt, würde ich sie für den Einsatz auf Repeatern noch nicht empfehlen. Für den eigenen Hotspot lohnt sich der Test aber auf jeden Fall.
Vielen Dank an Andy für diese Software!